Posts

Showing posts from August, 2023

Unveiling The Hidden Beauty: The Impact Of Professional Tile And Grout Cleaning

Image
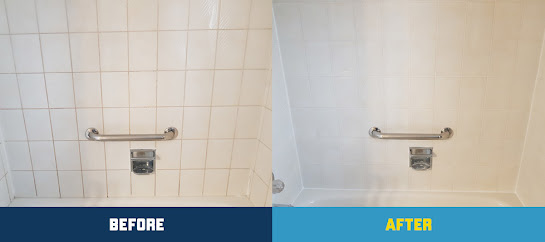
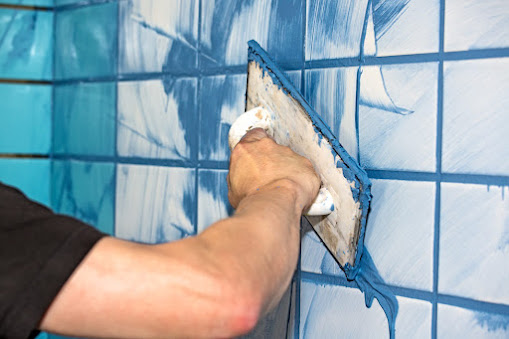
Do you ever look at your tiled floors and wish they could regain their original shine and beauty? It's not just a dream – with professional tile and grout cleaning, you can unveil the hidden beauty of your floors and make them look as good as new. In this blog, we'll explore how professional Tile and grout cleaning Service In Burlington Ontario , can transform your tiles and grout, bringing out their true charm. The Trouble with Dirty Tiles and Grout Over time, the spaces between tiles, known as grout, can accumulate dirt, grease, and stains. Regular mopping might not be enough to remove these stubborn marks. Similarly, the tiles themselves can lose their luster due to the grime buildup. This can make your once-beautiful floors appear dull, aged, and uninviting. The Magic of Professional Cleaning Here's where professional Tile and grout cleaning Service In Burlington Ontario, comes to the rescue. It's not just about making your floors look clean – it's about restor

A Guide To Transform Your Tiles With Effective Loose Grout Repair

Image
  Tiles are one of the finest choices for flooring and wall coverings due to their durability, versatility, and aesthetic appeal. However, over time, even the best-installed tiles can develop a common issue: loose or crumbling grout. Not only does this compromise the appearance of your space, but it can also lead to more significant problems if left unaddressed. In this guide, we'll walk you through the process of effectively loose grout repair in Hamilton Ontario to transform your tiles and restore the beauty and integrity of your surfaces. Step-by-Step Guide for Loose Grout Repair Step 1: Assessment and Preparation Before you begin, assess the extent of the loose grout issue. Inspect the affected areas and determine if the grout needs a simple touch-up or a more thorough repair. Gather the necessary tools, including a grout saw, replacement grout, a putty knife, a sponge, and a bucket of water. Step 2: Removing Damaged Grout Using a grout saw, carefully remove the damaged or l